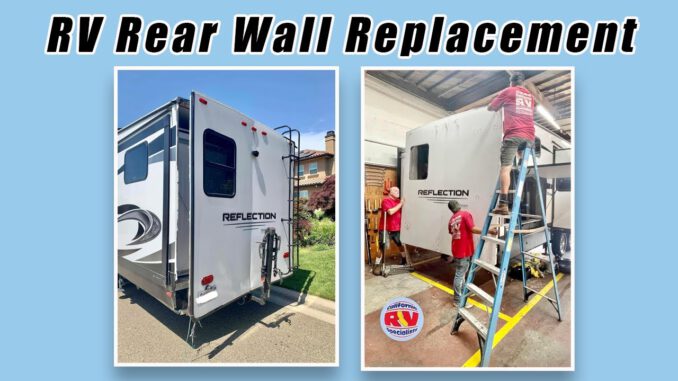
In the video below see rear wall impact damage, we are looking at one of our customer’s RVs. They recently clipped the rear wall on their Grand Design Reflection. Check out the repairs we made, like doing a full RV rear wall replacement, and what we still have left to do!
Impact damage can be a frightening experience if you are driving or towing a large RV. It can cause some major damage to the vehicle and those around you. We encourage you always to take your time when traveling and to drive safely.
RV insurance is specifically designed to cover repairs required due to collision, physical damage, theft or weather. Most shops will help guide you through the process.
Did you know? By law it is your right to choose where you have your RV repaired.
Advertisement/Affiliate
Replacing the rear wall of a fifth wheel is a significant undertaking and requires careful planning and execution. Here’s a general guide to help you with the process:
Tools and Materials:
- Replacement Wall: Obtain a replacement rear wall that matches the specifications of your fifth wheel. You may need to contact the manufacturer or a specialized RV parts supplier.
- Tools:
- Safety Equipment:
Advertisement/Affiliate
Steps to replace a wall:
- Prepare the Area:
- Ensure the fifth wheel is parked on a level surface.
- Disconnect any utilities (electricity, water, gas) and remove any components attached to the rear wall.
- Interior Disassembly:
- Remove the interior components attached to the rear wall, such as furniture, cabinets, or appliances.
- Carefully disconnect wiring and plumbing as necessary.
- Exterior Disassembly:
- Remove any accessories attached to the rear wall, such as lights, bumper, or ladder.
- Use a screwdriver or drill to remove screws securing the rear wall to the frame.
- Cutting and Removal:
- Use a jigsaw or reciprocating saw to carefully cut along the edges of the rear wall. Remove any screws or fasteners as you go.
- Have assistance to support the wall during cutting to prevent it from falling.
- Clean and Inspect:
- Clean the area where the old wall was attached, removing any remaining sealant or adhesive.
- Inspect the frame and surrounding structure for any damage or issues that need addressing before installing the new wall.
- Install the New Wall:
- Lift the new rear wall into position and secure it to the frame using screws or fasteners.
- Ensure the wall is level and properly aligned.
- Sealing and Caulking:
- Apply an appropriate sealant or caulking around the edges of the new wall to prevent water intrusion.
- Seal any seams or joints carefully.
- Reassembly:
- Reinstall interior components that were removed earlier.
- Reattach any exterior accessories.
- Test and Inspect:
- Check for any leaks or gaps by spraying water on the replaced wall and inspecting for water entry.
- Ensure all components are functioning correctly.
- Final Touches:
- Apply any finishing touches, such as painting or adding trim, to enhance the aesthetics of the replaced wall.
Always refer to the specific instructions provided by the manufacturer of your fifth wheel, as procedures may vary. If you’re not confident in your ability to perform this task, consider seeking professional assistance from an RV repair specialist.
More From Dustin
Make sure you check out Dustin’s website, California RV Specialists, and their YouTube channel for more helpful information, and other social media pages.
