
Today I’m going to talk about some summertime cleanup regarding clearance lights. Each year we see a lot of hidden water damage in these lights. For this example, let’s look at your clearance light lenses, bases, and sealants.
Most RVers end up having to repair, replace or caulk around their RV clearance lights when they begin to stop working, are missing a lens, or showing signs of leaks.
I recommend that you remove all exterior clearance light lenses IF they are removable. Some clearance light lenses are molded to the light base itself.
Don’t forget about your taillight lenses and any other exterior light lenses on your unit. Let’s see if there is any dirt or water intrusion getting into them or the walls.
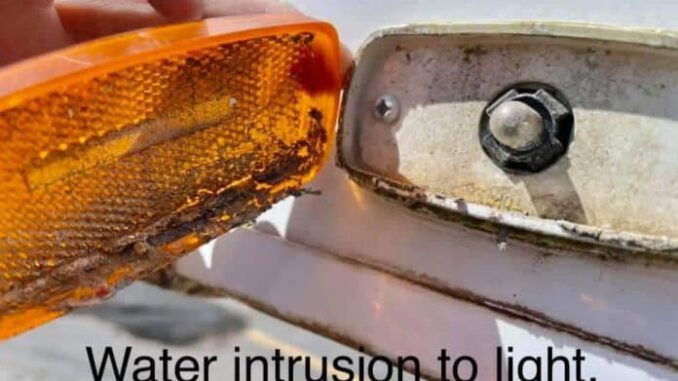
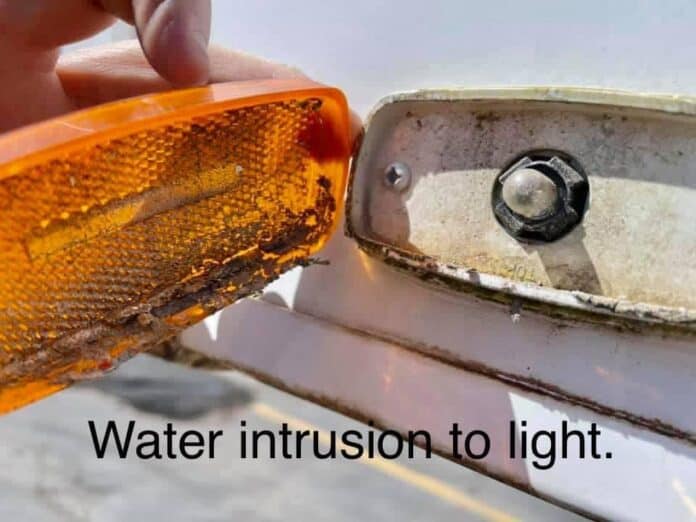
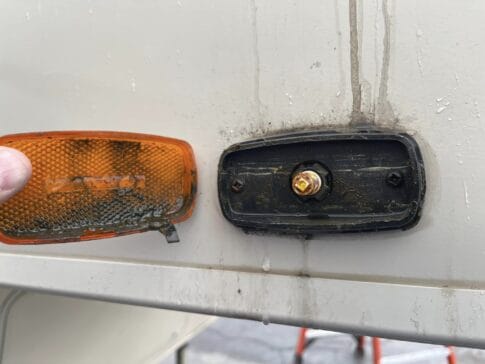
In the pictures above and below you will see where dirt and water got between the lens and the base.

I want you to keep in mind that the white lens base will turn yellow and shrink more often. This will allow water and dirt to get in easier. I have noticed that the black bases seem to last longer. But it’s still a good idea to check them all.
Cleaning clearance lights tips
If you need to, you can add some clear silicone to the top edge of the lens when reinstalling it. Since it’s silicone, you can remove the lens easily when it’s time to replace the light bulb. This will save you time and money, and prolong having to replace the base. However, if the lenses have been replaced and they keep falling off, I would recommend just replacing it.
If you have decided to remove the base, here are some additional things to consider:
- Seal the hole in the wall. This will prevent water, condensation and air leaks from causing damage to the wall or siding of your unit.
- When reinstalling the base you can use putty tape, silicone or even non-sag roof sealant behind the base.
- Make sure not to over-tighten the screws because this will cause the base to flex and can cause the lens not to seal well or come off in travel.
I typically like to apply a thin layer of silicone to the top edge like a cap seal before reinstalling the lens. After everything is installed I take clear silicone or clear Boss sealant and apply around the base as a final barrier to protect the walls and siding.
If the bases are dirty when you inspect them, simply brush them off or wash them off by hand. I know this is a long process and seems to be more difficult. However, preventing water damage to your side walls, floor, and interior walls is well worth your time and so much easier on your wallet.
I really hope this information helps protect your investment.
DIY product links for clearance light maintenance:
- Acrysol Body Solvent Cleaner
- Scraper tool blue CRL stick
- Tapered Tip Stick and Handle
- The best caulking gun
- Boss sealant 378 clear
- Boss sealant 378 black
- Geocel GC28100 Pro Flex RV Flexible Sealant Clear
- Geocel 28101V Pro Flex White RV Flexible Sealant
Make sure you check out Dustin’s website, California RV Specialists, and their YouTube channel for more helpful information, and see our published articles on RVtravel.com and other social media pages.
Thank you,
Dustin

