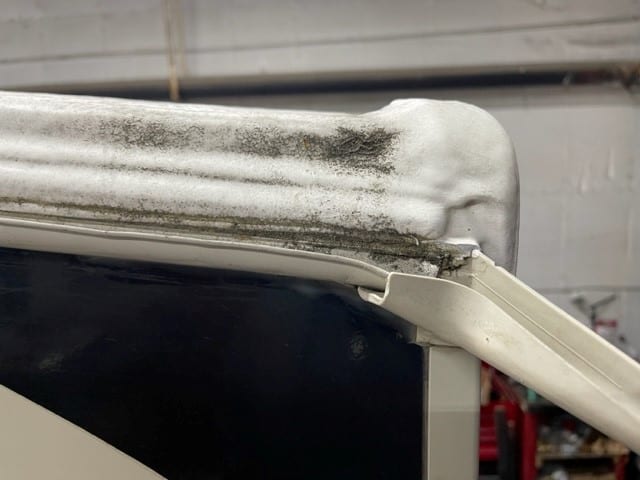
While we don’t install FlexArmor on RVs at our repair shop, we do see them from time to time. Check out the video below for an inspection of a FlexArmor roof in the shop.
There are certainly some benefits to this upgrade, but as an RV repair shop owner and former technician, I do have some concerns regarding the application.
Watch this video before you make the investment!
Every once in a while we have owners that come in with units that have had the FlexArmor roof coating applied. We have been replacing coatings on RV roofs for 25+ years. We replace around 50+ roofs a year due to some type of damage.
We’ve come across different roofs that have just required normal routine maintenance, like gutter spout replacements, insert molding replacements and other miscellaneous items. We have also had owners that have had the normal roof line molding come loose, which happens when the unit flexes side to side in travel or even walking in it when parked.
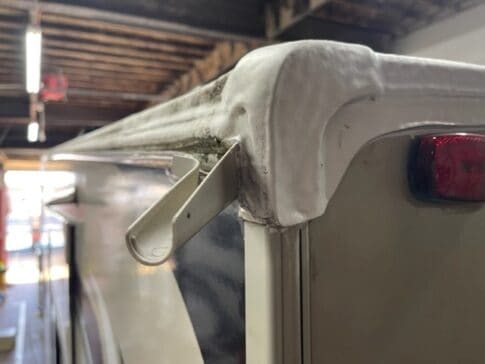
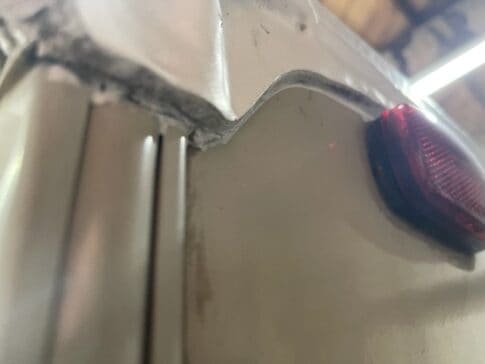
The following are concerns about FlexArmor that are based on my personal experience. Now, we are not saying anything bad about the product. In fact, we think it’s a good option. However, due to the way it was applied in these pictures, you will see why we are concerned.
Rear corner and side seams
I’m concerned about the insert molding, the rain gutter, the side molding and the rear cap corner cover.
Why:
- When the insert molding shrinks up on the lower side and starts to come loose, this will allow dirt and water to enter the back side and cause damage to the screws that secure the side wall molding to the edge.
- When the gutters go bad due to the sun, the material will not have to be cut into to remove and replace the gutters.
- If the rear roof or rear wall has to be repaired in any way, the roof coating will now have to be cut to make any repairs. Also, as the plastic dries out on the corner molding and shrinks, this will again be an issue.
- As the side seam starts to flex and come loose, the screws start to back out and the insert molding will have to be removed. Again, this will cause an issue with the roof coating.
Rear wall and side wall
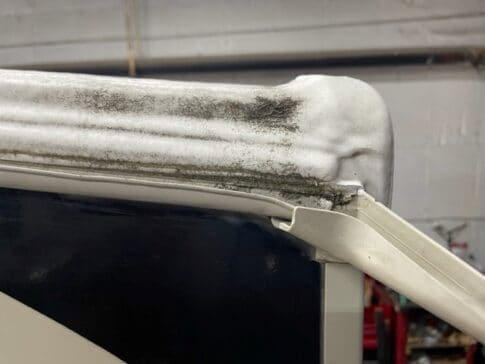
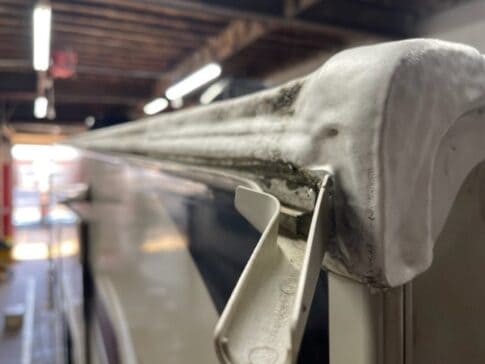
Here, I’m concerned with the insert molding, the rain gutter, side molding and rear cap corner cover, and rear cap molding.
Why:
- Same concerns as above. If, and when, the rear side wall corner moldings become loose or get damaged, the roof material will again become an issue when it comes time to make any repairs.
- With the rear cap molding, the seams all flex and move, and over time the molding at the roof surface will separate.
Front cap and moldings
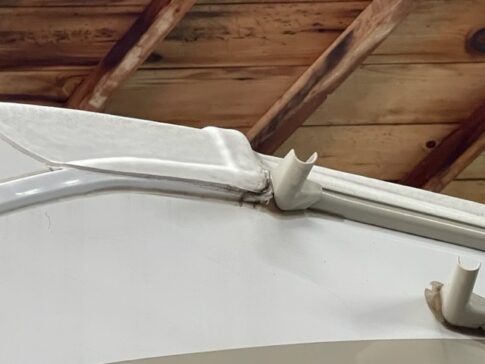
Here, I’m concerned with the screw cover side wall moldings, the rain gutter, and side molding.
Why:
- Just as stated above, as the body and front cap flex, the screws will become loose, back out and fail. When this happens, the screw cover molding will need to be removed in order to tighten, thus again causing damage to the roof coating.
- Rain gutter will once again be an issue at the time of replacement, causing damage to the roof coating.
- Insert molding once again will be an issue at the time of replacement, causing damage to the roof coating.
- In the event that the front cap is ever damaged and requires removal or replacement, the coating will once again become an issue.
Make sure you check out our website, California RV Specialists, and their YouTube channel for more helpful information, and see our published articles on RVtravel.com and other social media pages.
