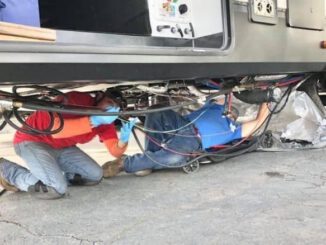
One of the most frustrating things for an RVer is having to deal with a leak underneath the RV in the underbelly area! If you didn’t know, this is a dreaded repair for any RV technician. As you will see in the pictures below, there is a mess of wires and plumbing that we have to contend with when trying to pinpoint the leak. RV underbelly leak repairs can be like looking for a needle in a haystack.
Contributing factors that can cause an underbelly leak
- Supply lines could have been improperly run and not secured into place.
- Road vibration and flex, causing wear and tear/rubbing underneath the unit.
- Normal use from the water pump causing vibration.
- Improper use by not using a water pressure regulator.
Why is this repair such a nightmare?
- On average there are 200+ water line connections throughout the unit.
- Heat ducting and electrical wiring is often in the way.
- In most cases, we also have to pull LP lines, power/manual leveling jacks and/or styrofoam around pipes in order to inspect an area and make repairs.
If you are experiencing a leak, there is some helpful information that you can provide that will save your technician some time, which will also hopefully help save your pocketbook:
- Is the leak from the black, gray or fresh water tank?
- Is the leak hot or cold water?
- Was the tank overfilled or is it a drain valve leak?
Knowing this information will help locate the leak faster.
Finally, should you end up in a position of needing an underbelly leak repair, whether it is you or an RV technician, this is your golden opportunity to do the following while having the underbelly removed:
- Add additional insulation.
- Add more spray foam where needed. This will help seal off any penetrations from the floor to the house which will help reduce the interior heat or cooling loss. In addition, this will also help reduce the path of entry for pests, rodents, and dust/dirt.
- Secure all water lines and electrical wiring that is floating around to help prevent future leaks.
- Secure and retape all heat ducts and piping.
If you are doing these repairs yourself, here are some links to items you’ll need to complete the job:


