
By Dustin Simpson, California RV Specialists
If you have determined that it’s time to replace your window glazing seals, where do you start?
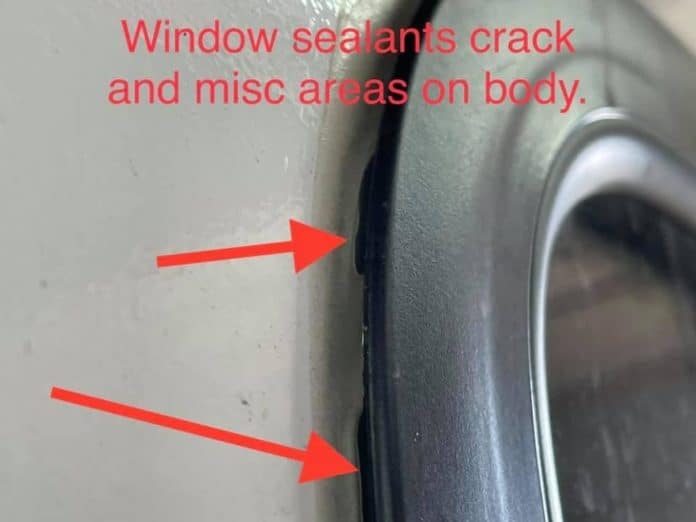
Window glazing seals are often overlooked, but they are one of the most important parts of your RV. The glazing bead is what keeps the glass in place when traveling down the road. If this seal comes out, the glass can, and will over time, come loose and cause damage to the window.
What type of window glazing seal do you need?
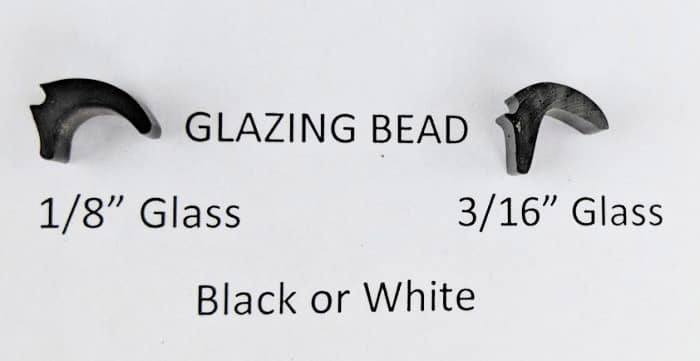
The first step to replacing the seals is finding out what type of seal you need. In most cases, not every seal is replaceable. When customers come in asking to purchase the seal, it’s very important to cut a small sliver of the seal so that we could measure it.
Advertisement/Affiliate
There are two sizes that the window companies use and it’s almost always sold by the foot. In some cases, it’s sold only by the roll and in large amounts such as 250 feet+.
As with anything, there is always a vendor number that is needed, just like a model and serial number. Each window will have a number tag on the inside edge of the window that is hidden in the wall cutout. The only way to get to this number for any replacement parts or for the exact sizes is by pulling them out of the RV.

Basic tools and products used for window glazing seal repairs or replacement:
- AcrySol body solvent. This adhesive remover will be handy for removing the old seal, silicone, and glue.
- Paper towels or old rags will help to remove the old sealants. You will want to wipe out the channel of dust, dirt and grime. You could also use a toothbrush and clean with the solvent before you replace the seal. You’ll want to do this before you glue any edges or corners.
- Scraper/window glazing tool. This is a great tool for removing the old seal and pressing the new seal in place. It also works great for removing any old sealants and putty around the window frame.
- Use the instant adhesive Loctite 495. This is not necessary but it will add security in edges and corners.
As always, these chemicals can be dangerous if not used right, so please make sure to protect your eyes and hands.
If you can’t replace, repaint
Another little trick I like to do is to repaint the seal if it’s not too bad. In some cases, the seals used are no longer available, so by cleaning and painting the surface of the seal it will make it look new again. Doing this also helps protect the seal that is still there. There’s a bunch of different types of spray paint, everything from Rust-Oleum to automotive plastic spray paint. Make sure to test it out before you just tape it up and start painting.
DIY Project
- Rust-Oleum 211339 Specialty Spray Paint for Plastic, 12 oz, White
- Rust-Oleum 211338 Specialty Spray Paint for Plastic, 12 oz, Black
- 3M – Scotch-Blue 2090 Multi-Surface Painter’s Tape – 2inches
- Tape and Drape, Masking Paper, Auto Body Masking Paper
- Razor Blade Scraper, 2 PCS Razor Scraper
- AcrySol body solvent
- Loctite Super Glue Plastic Bonding system, Clear Superglue for Plastic
More from Dustin
Read more of Dustin’s articles here.
Dustin owns and operates California RV Specialists, an independent RV repair shop located in Lodi, CA. He thrives on sharing his knowledge and enthusiasm of RV repair and maintenance with his team, customers, and virtual friends.
Be sure to check out his YouTube channel where he shares what’s going on in the shop and the product offerings in the store. Dustin is also very active on Facebook. Join his group, RV Repairs and Tips – What’s in the shop!
Dustin proudly operates the business alongside his wife, Ashley; but the true pair that run the show are their Boston Terriers, Arvie and Hitch.

