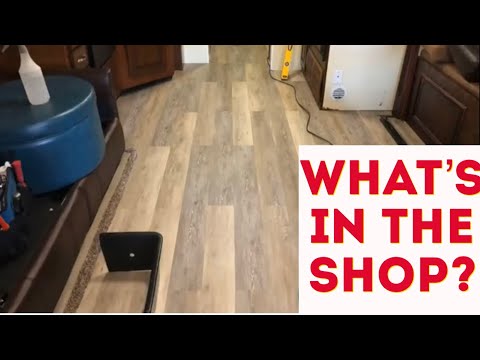
Whether your RV floor has a leak or a stain, or you simply want to update the look of your unit, replacing your flooring can be a costly option. Our shop does RV floor replacement, but 95 percent of the time it’s because a catastrophic event occurred and insurance is footing the bill.
This is also my warning for consumers who are shopping for a used unit. RV floor replacement isn’t that simple or cost-effective! Make sure you watch the video below.
Why does floor replacement cost so much?
Replacing RV flooring is NOT like replacing flooring in your house.
Your house furniture is easily lifted and moved to another room or outside. RV furniture is bolted in place. After unbolting the furniture, for the most part, it will be too large to fit through the entry door. Therefore, that furniture will remain inside, and our technicians will move it from one side of the unit to the other as they work.
Your RV has specially designed trim and fascia that is delicate. These items must be removed and reinstalled very carefully. If we were to damage these items, we most likely couldn’t order a replacement.
RV carpet is NOT installed like in a house with a tack strip. Your carpet is either glued down or stapled in place with thousands of staples (literally, thousands) that need to be removed— one by one. Either way, removing your existing flooring is time-consuming.
Many times, there are unseen items (anchors, carriage bolts, large gaps in seams) underneath your existing flooring that need to be removed or addressed before your new flooring is installed.
Here is what you need to know:
- Each RV floor replacement project varies. Determining factors include size, floor choice, slideout(s), any pre-existing damage underneath.
- Units without slideouts will take approximately 20–40 labor hours.
- Units with slideouts: 6–12 additional labor hours per slideout.
My advice to you
If you are currently shopping for a used unit
Before you fall in love with the floor plan, make sure to thoroughly inspect the flooring. Don’t inspect the flooring just by looking at it, walk through all areas of the unit. If there is soft flooring, run away and don’t look back. Even if it’s being sold for rock-bottom pricing, it won’t be worth the cost of repairs.
If you own a unit:
It is common for older units to show signs of wear and tear and even have some staining. Before you tear out the flooring, I’ve seen miracles happen when a professional detailing service is paid to steam clean and Scotchgard™ the floor. While it won’t be perfect, it can certainly refresh it a bit and extend the life of the current flooring.
I’ve also had customers, who were unhappy with any throw rug options, take measurements of their RV flooring areas and have a local carpet store make custom rugs.
If your unit has soft flooring, your only option is to have it removed and replaced. While it’s expensive, make sure you find a facility well-versed in RV floor replacement, especially if it involves a slideout.
Your RV goes through an earthquake every time you go down the road. I’ve seen enough horror stories of customers paying someone else to replace their floor and a few months later their slideout either doesn’t work or it’s tearing up their brand-new flooring. Those customers then have to pay a second time to have it replaced.
More from Dustin
Dustin owns and operates California RV Specialists, an independent RV repair shop located in Lodi, CA. He thrives on sharing his knowledge and enthusiasm of RV repair and maintenance with his team, customers, and virtual friends.
Be sure to check out his YouTube channel where he shares what’s going on in the shop and the product offerings in the store. Dustin is also very active on Facebook. Join his group, RV Repairs and Tips – What’s in the shop!

