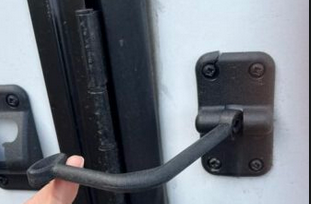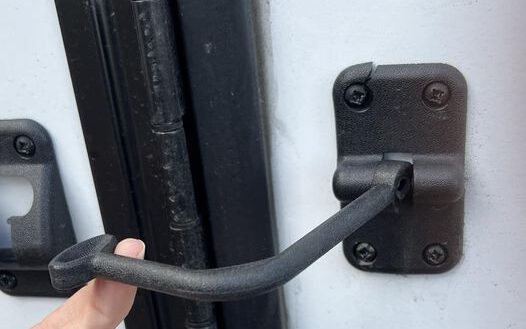
Join Dustin In The RV Shop as he explains how the entry door hold back on your RV plays a crucial role in keeping your door securely in place while you enjoy the comforts of your home on wheels. Over time, these components can wear out, leading to difficulties in keeping the door open. In this guide, Dustin will walk you through the steps to replace your RV entry door hold back, ensuring smooth functionality and added convenience.

Materials & Tools Needed:
- Plastic black entry door hold back
- Stainless steel entry door hold back
- Dewalt Ratcheting Screw Driver
- Dewalt Cordless Screw Driver Gun – Dustin Favorite Hand Tools
- Putty Tape
- Geocel RV Sealant
Step 1: Identify the Type of Door Hold Back Different RVs may have different types of door hold backs. It’s essential to identify the specific type you have before proceeding. Common types include latch-style hold backs or gas strut-style hold backs.
Step 2: Locate and Remove the Existing Hold Back Using a screwdriver (depending on the fasteners used), carefully remove the existing door hold back from the RV. Take note of the placement of screws and any specific attachment points for easy installation of the new hold back.
Step 3: Detach the Hold Back from the Door Once the hold back is removed from the RV, detach it from the door itself. This may involve removing additional screws or fasteners that connect the hold back to the door.
Step 4: Install the New Door Hold Back Align the new door hold back with the existing attachment points on the door. Secure it in place using the original screws or new screws if necessary. Ensure a snug fit to guarantee proper functionality. (If required you can use tri fold rivets 3/16″ x 3/4″ if holes are damaged.)
Step 5: Attach the Hold Back to the RV Now that the hold back is securely attached to the door, align it with the designated attachment points on the RV. Use the appropriate tools to fasten it in place, making sure it is firmly secured.
Step 6: Test the Door Open and close the RV entry door several times to ensure that the new hold back functions correctly. Check for smooth operation and make any necessary adjustments if the door doesn’t align properly.
Step 7: Lubrication (Optional) If your new hold back has moving parts, consider applying lubricant to ensure smooth operation. This step can help prevent premature wear and tear.
Replacing your RV entry door hold back is a straightforward process that can significantly improve the functionality and convenience of your RV door. By following these step-by-step instructions, you can easily install a new hold back and enjoy hassle-free entry and exit from your RV. Regular maintenance and periodic checks will help ensure that your door hold back continues to operate smoothly for years to come.
Cool RV Tools
- Spider Tool Holster Bitgripper
- DEWALT Screwdriver Bit Set
- DEWALT 20V MAX Impact Driver Kit
- DEWALT 12V MAX Impact Driver (tool only)
- DEWALT Phillips 6-Inch Impact Bit
- DEWALT 20V MAX Battery Pack
More from Dustin
Make sure you check out my website, California RV Specialists, and our YouTube channel for more helpful information, and see our published articles on RVtravel.com and other social media pages.
