Your RV roof is one of the most important areas of your recreational vehicle to maintain, yet it’s also one of the most commonly overlooked. Small cracks, deteriorating sealants, and improperly sealed roof moldings can allow water to enter your RV without showing any immediate signs of an interior leak.
At California RV Specialists in Lodi, California, we’ve been servicing and repairing recreational vehicles since 2003. One of the most common problems we encounter is water intrusion caused by neglected or improperly maintained roof sealants.
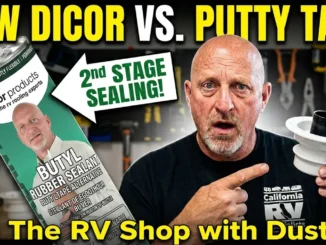
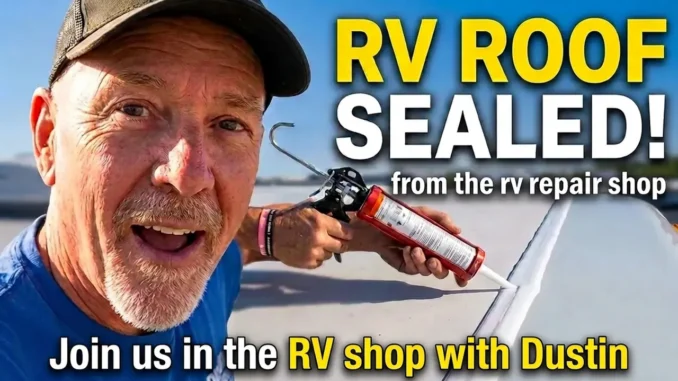
In our accompanying video, our experienced RV technician Dave demonstrates how to apply Dicor roof sealant around RV roof seams and moldings, sharing practical techniques used in our repair facility.
Why RV Roof Sealing Is So Important
RV roofs are constantly exposed to sunlight, temperature changes, road vibrations, rain, dirt, and normal body movement.
Here in California, prolonged UV exposure and high summer temperatures can accelerate the deterioration of certain roofing and sealing materials.
Over time, roof sealants can shrink, crack, separate, or lose adhesion. When this happens, rainwater and moisture may enter around roof seams, moldings, fasteners, and accessories.
Unfortunately, many RV owners don’t discover these problems until water has already reached the roof decking, insulation, or interior structure.
Preventive roof maintenance is generally far less expensive than repairing extensive water damage.
What Is Dicor RV Roof Sealant?
Dicor manufactures several products commonly used on recreational vehicle roofing systems.
One of the most familiar is Dicor self-leveling lap sealant, which is designed for compatible horizontal roof applications.
Depending on the roofing system and manufacturer requirements, approved sealants may be used around:
- Roof vents and plumbing vents
- Skylight flanges
- Front and rear roof termination moldings
- Compatible roof-mounted accessory flanges
- Certain roof seams and fastener locations
It’s important to understand that not all Dicor products are interchangeable.
Self-leveling sealants are generally intended for approved horizontal applications, while non-sag sealants may be required for vertical surfaces.
Always verify that the sealant is compatible with your RV’s roofing membrane and the specific joint being repaired.
How to Properly Apply RV Roof Sealant
One of the biggest mistakes RV owners make is applying new sealant directly over dirty, deteriorated, or loose materials.
Proper surface preparation is essential for a successful repair.
1. Inspect the Existing Sealant
Before applying anything, inspect the entire roof for cracks, separation, exposed fasteners, damaged moldings, and areas where the sealant has become thin.
Pay particular attention to roof transitions, penetrations, and previously repaired areas.
2. Clean and Prepare the Surface
Remove failed or loose sealant where necessary and clean the area using products approved for the roofing material.
The surface must be properly prepared and dry before applying new sealant.
Avoid aggressive scraping or incompatible solvents that could damage the roof membrane.
3. Apply the Correct Sealant
Apply the appropriate sealant according to the manufacturer’s instructions for bead size, coverage, and application conditions.
On approved horizontal surfaces, self-leveling lap sealant spreads to cover the intended joint.
Make sure the required seams and fastener locations receive adequate coverage.
4. Allow Proper Curing
Sealants require time to develop their intended properties.
Curing depends on the product, application thickness, temperature, and environmental conditions.
Follow the sealant manufacturer’s instructions.
5. Inspect the Finished Repair
After application, inspect the area for missed sections, gaps, or other concerns.
Remember that a sealant overlay cannot correct loose moldings, damaged roof decking, or improperly assembled joints.
Those conditions require separate repairs.
Watch our RV technician Dave demonstrate roof sealing techniques and explain why proper application around seams and moldings is so important.
Why Adding More Sealant Isn’t Always the Answer
At California RV Specialists, we regularly encounter RV roofs where multiple layers of sealant have been applied over previous repairs.
While compatible sealant overlays can be appropriate in certain situations, repeatedly adding material without inspecting the underlying joint can conceal existing problems.
For example, a loose roof molding may require removal, inspection, and proper installation of bedding material before exterior sealing.
Simply applying additional caulking over the outside may not correct the original water entry point.
The objective is to maintain a properly sealed roof assembly, not simply to make the sealant thicker.
How Often Should You Inspect Your RV Roof?
We encourage RV owners to follow their manufacturer’s recommended inspection and maintenance schedule.
As a general preventive maintenance practice, inspecting roof seams and sealants approximately every three months—and after severe storms, overhead impacts, or extended storage—can help identify developing problems.
Pay particular attention to roof edges, moldings, and accessories before and after extended travel.
If you aren’t comfortable accessing the roof safely, have a qualified RV technician perform the inspection.
Some RV roofs are not designed to support foot traffic, so always verify the manufacturer’s recommendations.
Free RV Roof and Exterior Body Inspections in Lodi, California
At California RV Specialists, we offer free RV roof and exterior body inspections to help owners identify maintenance concerns before they become major repairs.
Our independent RV repair facility has served RV owners since 2003, providing specialized maintenance and repair services without selling recreational vehicles.
Our services include:
- RV roof inspections, resealing, repairs, and roof coatings
- Complete exterior body resealing
- RV slide-out maintenance and repairs
- Wheel bearing and brake services
- Fifth-wheel and travel trailer suspension upgrades
- Flat towing equipment installations
- RV appliance inspections and maintenance
- Manufacturer warranty repairs for participating brands
Located in Lodi, California, we assist RV owners throughout Stockton, Sacramento, Modesto, Elk Grove, Galt, the Central Valley, and surrounding Northern California communities.
Schedule Your RV Roof Inspection With California RV Specialists
If you’re concerned about deteriorating roof sealants, cracking around moldings, or possible water intrusion, don’t wait until damage becomes visible inside your RV.
Our team can inspect your roof and help determine which maintenance or repair services are appropriate.
California RV Specialists
200 S. Cherokee Lane
Lodi, CA 95240
Business Hours: Monday–Friday, 8:00 AM–4:00 PM
Closed for lunch from 12:00 PM–1:00 PM
Website: https://www.calrvspecialists.com/
Free Services: RV roof and exterior body inspections, slide-out inspections, and fifth-wheel hitch inspections.
Please contact our office to schedule an appointment. We operate as a drop-off repair facility and do not provide mobile RV service.
The bottom line: Proper RV roof sealing starts with inspection, surface preparation, compatible materials, and attention to detail. Maintaining your roof seams and moldings can help prevent hidden water damage and protect your RV for years to come.