Removing old RV sealant can be one of the most frustrating parts of maintaining a recreational vehicle. Whether you’re preparing to reseal exterior moldings, windows, doors, or other body components, removing deteriorated sealant properly is essential for achieving a clean, reliable repair.
Many RV owners assume that removing old sealant requires aggressive scraping, strong chemicals, or hours of difficult labor. However, using the right approach and understanding the type of sealant you’re working with can make the process easier and help prevent damage to your RV.
At California RV Specialists in Lodi, California, we’ve been maintaining and repairing recreational vehicles since 2003. Exterior body resealing is one of the preventive maintenance services we regularly perform, and proper surface preparation plays a major role in the quality of the finished work.
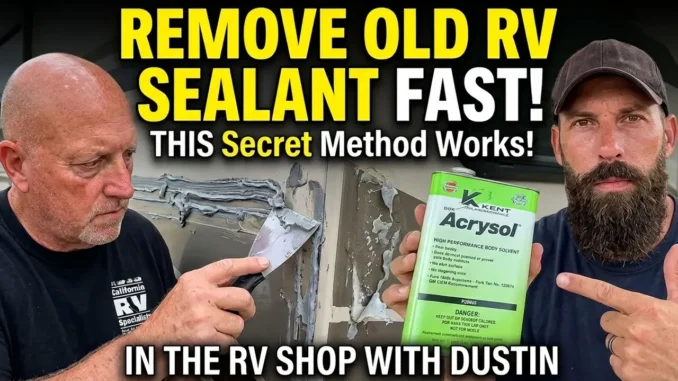
In our accompanying YouTube video, Dustin from California RV Specialists joins Chris from the YouTube channel WHY WAIT to discuss how to effectively remove old RV body sealants and why the right removal techniques matter for long-term maintenance.
Why Removing Old RV Sealant Matters
Exterior sealants help protect the joints and seams around RV body components from water intrusion.
Over time, these materials can deteriorate due to:
- UV exposure and sunlight
- Temperature changes
- Road vibrations and body flexing
- Dirt and environmental contamination
- Normal aging and weather exposure
- Previous maintenance using incompatible products
When exterior sealant begins cracking, separating, or losing adhesion, moisture may enter the underlying joint.
Simply applying new sealant over contaminated or poorly bonded material can lead to adhesion problems and may leave the original water entry point unresolved.
Proper preparation is one of the most important steps in any RV exterior resealing project.
The Biggest Mistake RV Owners Make When Removing Sealant
One of the most common mistakes is reaching for a sharp metal scraper or aggressive chemical remover without first identifying the existing sealant and the surface underneath it.
RV exterior panels may include painted aluminum, fiberglass, gelcoat, plastic, vinyl graphics, and other materials that can be scratched, stained, or damaged.
A tool or solvent that works on one surface may cause permanent damage to another.
Before starting, determine what material you’re removing and whether the proposed removal method is approved for that particular surface.
How to Remove Old RV Body Sealant More Effectively
The easiest approach often begins with using the least aggressive method that will safely remove the failed material.
1. Identify the Existing Sealant
Not all RV sealants are the same.
Common materials include silicone, polyurethane, hybrid polymer sealants, and other specialized exterior sealing products.
Some remain relatively flexible, while others become harder or more difficult to remove as they age.
Knowing the product type helps determine which removal techniques are appropriate.
2. Use Surface-Safe Removal Tools
Plastic scrapers and other nonmetallic tools can be useful for removing loose or deteriorated material without unnecessarily scratching the surface.
Work carefully along the existing bead rather than forcing a tool beneath painted panels, trim, or graphics.
Avoid cutting into the underlying body materials.
3. Consider Approved Sealant Removal Products
Certain sealant removers or adhesive-softening products may help loosen compatible materials.
However, not every remover is safe for fiberglass, painted surfaces, plastics, or vinyl graphics.
Always check product compatibility and test an inconspicuous area before proceeding.
Follow the manufacturer’s safety instructions and avoid using unapproved solvents.
4. Remove Residue and Contamination
After removing the bulk of the old sealant, inspect the surface for remaining residue.
New sealant must be applied to a properly prepared surface according to the replacement product’s instructions.
Residual silicone, oils, waxes, dirt, or incompatible chemicals can interfere with adhesion.
5. Inspect the Joint Before Resealing
Removing the old sealant creates an opportunity to inspect the underlying joint.
Look for loose moldings, missing fasteners, damaged components, gaps, and signs of possible water intrusion.
If the molding or joint itself is failing, new exterior sealant alone may not correct the problem.
Join Dustin from California RV Specialists and Chris from WHY WAIT as they discuss practical approaches to removing old RV body sealants and preparing exterior surfaces for maintenance.
Should You Remove Every Bit of Old Sealant?
Not necessarily.
The appropriate amount of removal depends on the condition of the existing sealant, the type of repair, and the manufacturer’s instructions for the replacement material.
Some compatible sealants can be applied over properly prepared, firmly adhered existing material.
Other repairs require complete removal of the previous sealant.
If the original material is loose, contaminated, incompatible, or concealing a damaged joint, additional removal and repair may be necessary.
The goal is not simply to remove as much material as possible. It’s to create a properly prepared, sound surface for the intended repair.
Why We Recommend Regular RV Exterior Body Inspections
At California RV Specialists, we frequently encounter RVs with deteriorating sealants around exterior moldings, windows, doors, and body penetrations.
Here in California, prolonged sunlight and temperature changes can contribute to sealant aging.
We encourage RV owners to inspect exterior sealants regularly, following their RV manufacturer’s maintenance schedule.
As a general preventive practice, inspections approximately every three months can help identify developing concerns before they become major problems.
It’s also important to inspect your RV after severe storms, long trips, or extended storage.
Remember, water intrusion may occur long before you notice an interior leak.
Why Professional RV Body Resealing Can Be Worthwhile
A complete exterior body reseal involves more than simply applying new caulking.
Proper work may include evaluating the existing sealants, preparing the surfaces, addressing damaged or loose components, and applying compatible sealing materials.
At California RV Specialists, we perform exterior body resealing services to help owners maintain weather-resistant joints and reduce the risk of water intrusion.
Customers who have a complete exterior body reseal performed at our facility are also scheduled for a 90-day follow-up inspection and spot sealing service at no additional charge.
This allows us to evaluate the completed work and address areas that may require additional attention.
Free RV Roof and Exterior Body Inspections in Lodi, California
California RV Specialists is an independent RV repair facility that has served recreational vehicle owners since 2003.
We offer free RV roof and exterior body inspections to help identify potential maintenance concerns.
Our services include:
- Complete RV exterior body resealing
- RV roof inspections, repairs, resealing, and roof coatings
- Exterior molding, window, and door repairs
- RV slide-out inspections and repairs
- Wheel bearing and brake services
- Fifth-wheel and travel trailer suspension upgrades
- Manufacturer warranty repairs for participating brands
Located in Lodi, California, we serve RV owners throughout Stockton, Sacramento, Modesto, Elk Grove, Galt, and surrounding Northern California communities.
Schedule Your Free RV Exterior Inspection
If you’re dealing with cracking sealants, deteriorating caulking, loose moldings, or possible water intrusion, our team can help evaluate your RV.
California RV Specialists
200 S. Cherokee Lane
Lodi, CA 95240
Business Hours: Monday–Friday, 8:00 AM–4:00 PM
Closed for lunch: 12:00 PM–1:00 PM
Website: https://www.calrvspecialists.com/
Free Inspections: RV roof and exterior body inspections, slide-out inspections, and fifth-wheel hitch inspections.
Please contact our office to schedule an appointment. We operate as a drop-off repair facility and do not offer mobile RV service.
The bottom line: Removing old RV sealant doesn’t have to mean aggressive scraping or harsh chemicals. Understanding the material, using surface-safe tools, and preparing the joint properly can make maintenance easier while helping protect your RV from future water intrusion.